Sales & Admin
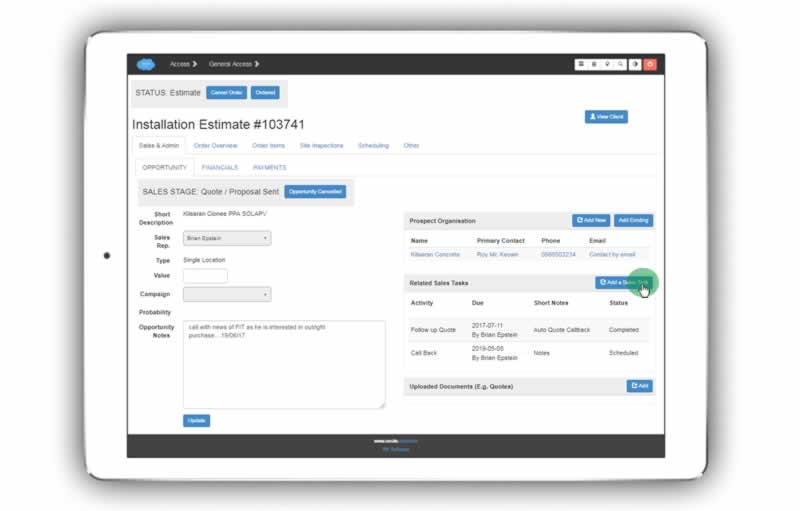
The Sales & Admin tab for the estimate / order focuses on progressing the opportunity, winning the order, and tracking related administrative details.
Sales (The Opportunity)
You can set up the sales statuses to suit your internal sales processes.
Sales Stages

The default sales stages are:
Un-qualified Enquiry
Qualified Enquiry
Quote / Proposal Sent
Won (Waiting for Order Signing)
Ordered / Signed
Opportunity Lost
Un-qualified Enquiry Cancelled
Lead Nurture
Note
When the sales stage changes to ‘Ordered / Signed’ the status of the order changes from ‘Estimate’ to ‘Confirmed Order’, and is now called an ‘Installation Order’.
Opportunity Detail
On the left side of the screen you can assign:
The sales rep for the opportunity
The estimated value of the opportunity
The marketing campaign that yielded the opportunity
Notes about the opportunity
Default probabilities are automatically assigned to each sales stage (to assist in measuring what is in the sales pipeline)
We customise ANY other entry you would like to store about the opportunity

Note
Ensure you click the ‘update’ button after making any changes.
Contacts for the Opportunity
On the right side of the screen you can add any contacts associated with the opportunity (either an existing contact on the system, or a new contact).

Note
Click through the contact name to get to the contact details screen. Click the phone number to call from your device. Click ‘Contact by email’ to send them an email.
Sales Tasks
This has already been covered in the sales section of Core Modules - Managing Sales Tasks

Financials

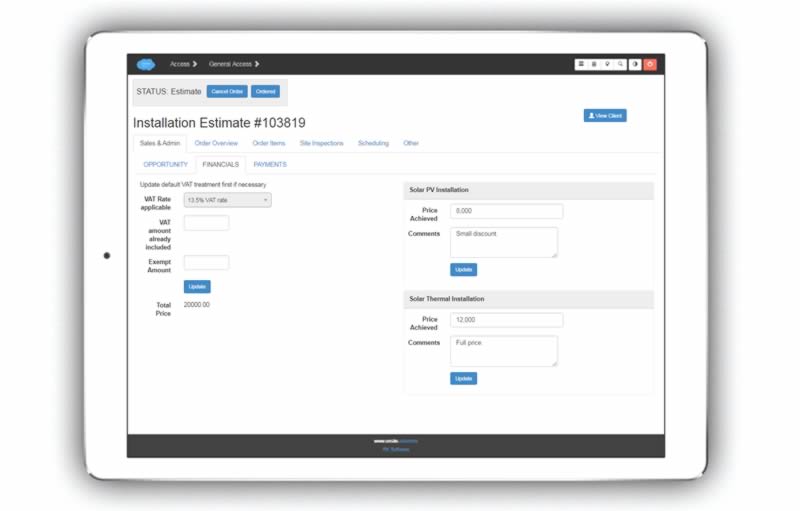
Recording the Price Achieved
Here you can record the price achieved by the sales rep and any break down required, for example by product category, discounts given, grants drawn on, comments on the transaction, and so on.
Tax Treatment
VAT rate may be recorded here, or whether a particular customer is VAT exempt and so on.
Payments (Optional)

Recording Deposits
This button can be included if collecting deposits is part of your workflow.
Note
The succesful recording of a deposit may be used to trigger the status of the order from ‘Estimate’ to ‘Confirmed Order’.
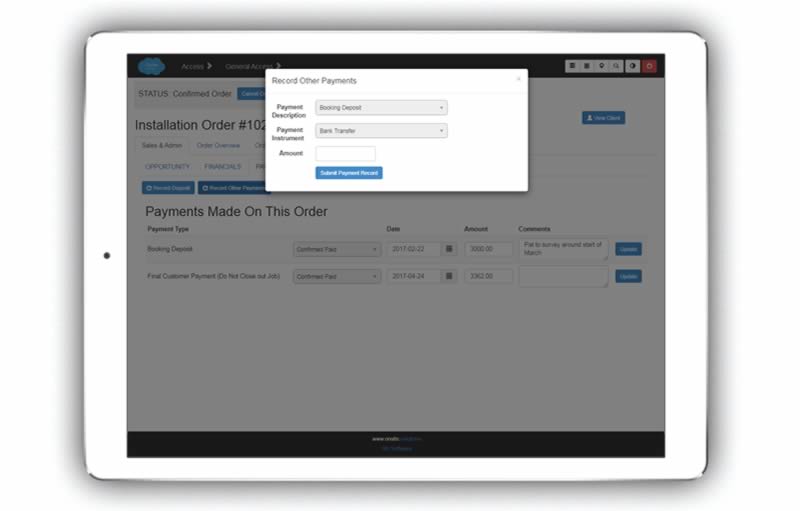
Recording Other Payments
Additional payments may be recorded, and similarly used to trigger actions, for example, closing out the order.
Choose the payment type, the payment instrument, enter the amount, and click submit. You may subsequently change the date, amount, and add comments to the payment.
Triggering Automation on Payments
Payments may be linked to any type of automation required to streamline your workflows and ensure your database is kept up to date.
Integrations
Payments received may be integrated with existing accounts packages like Quickbooks.